
Coverlight DIY installation guide
Pick the guide that matches your install type. Each guide takes under an hour and uses everyday tools.
Quick install guide
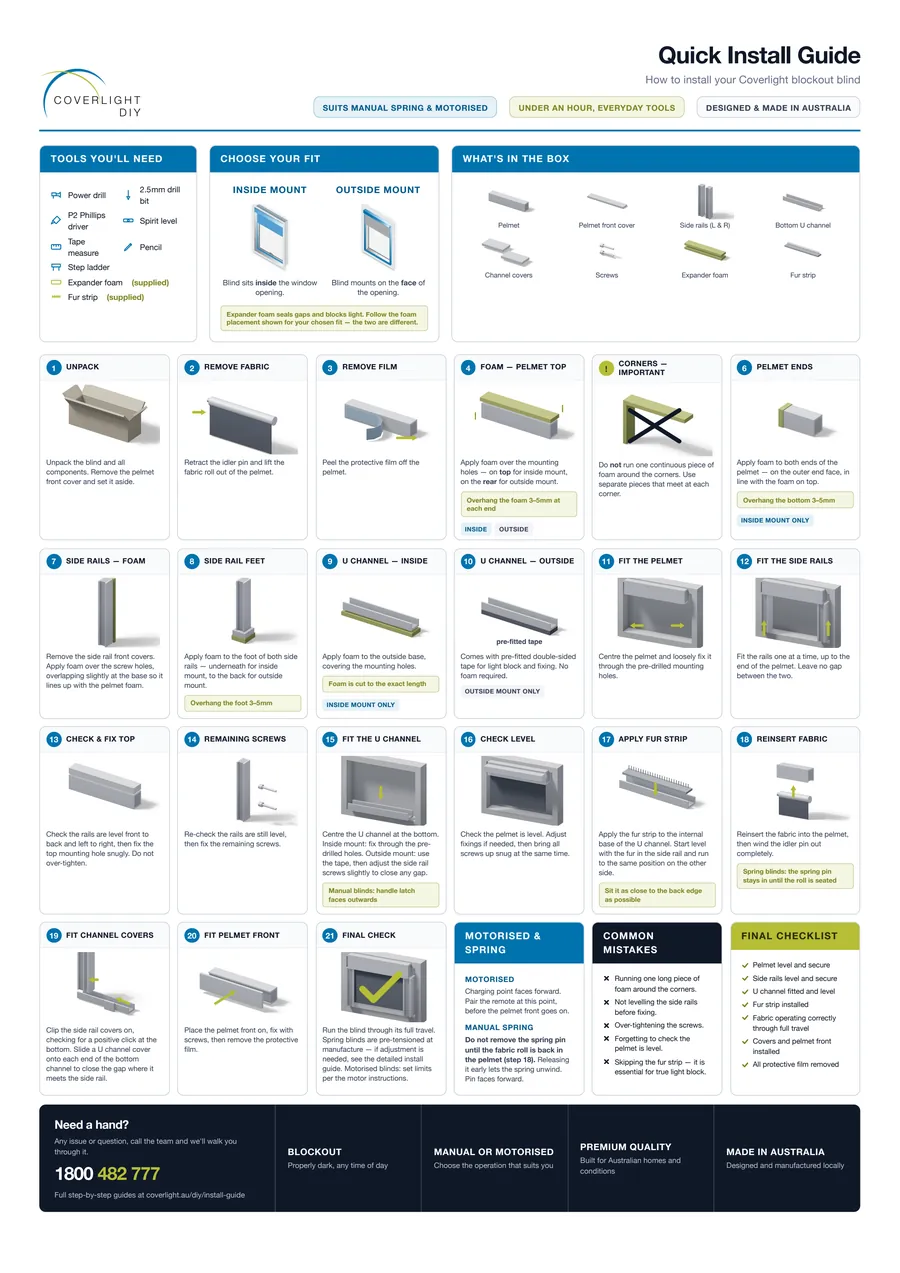
The whole install on one page: the tools you need, what’s in the box and each step for inside and outside mounts. Print it, or keep it open on your phone while you work.
Open the quick install guide (PDF)Want more detail? The step-by-step guides below cover each install type.
Step-by-step guides
Not sure which mount type you ordered? Check your order confirmation or the label on your headbox.
Inside mount, Underroll
Recess fit with the fabric rolling down behind the headbox. The most common setup.
15 steps · under an hour →Inside mount, Overroll
Recess fit with the fabric rolling down in front of the headbox. Slightly different positioning.
15 steps · under an hour →Outside mount, Underroll
Face fit on the architrave or wall. Use this when your window doesn’t have a deep enough recess.
12 steps · under an hour →Motor programming
For motorised blinds. Pair your remote, set limits, and connect to Zigbee smart home hubs.
~15 min →
What is the idler pin?

Removing the blind roll
Get prepared
Whichever install type you’ve got, you’ll want these things ready before you begin.
From your toolbox
- Power drill
- 2.5mm drill bit (timber, metal or plaster)
- P2 Phillips screwdriver
- Spirit level
- Step ladder
From your Coverlight box
- Check all parts against the included checklist
- If you have a masonry surface, ensure you have your masonry kit
Prepare your workspace
- Clear the area in front of your window
- Unpack your blind components and inspect for any transit damage
Mounting surface
The standard guides cover timber, metal and plaster. For masonry (brick, concrete, tile) and plaster (with stud detection), see the expandable sections at the top of each detail guide.
Stuck on a step?
We’re here to help. Most install questions are answered in our FAQs.
